 Stories in Structure
In my previous post — Geometry of Evidence — we followed how investigative journalists and algorithms reconstruct truth from fragments. This time, let’s do it ourselves.
In this short guide, you’ll run a Structure-from-Motion pipeline using Meshroom, a free and open-source photogrammetry tool that recreates 3D geometry from photographs.
On our agenda:
- Run a Structure-from-Motion pipeline step by step.
- Troubleshoot common issues (like the “white mesh” bug).
- Explore further resources and projects that shaped photogrammetry.
DIY
Software
My preferred software for photogrammetry is Meshroom. It performs the entire pipeline and is free and open source.
(You can find links to other software and related tutorials in the resources section.)
Steps
What you’ll need: a computer with a decent GPU and at least 10 GB of free disk space.
-
Download Meshroom for your operating system.
-
Download the photo set of The Waiting sculpture (≈ 610 MB).
Unzip it into a folder — you’ll load this into Meshroom in step 5.
-
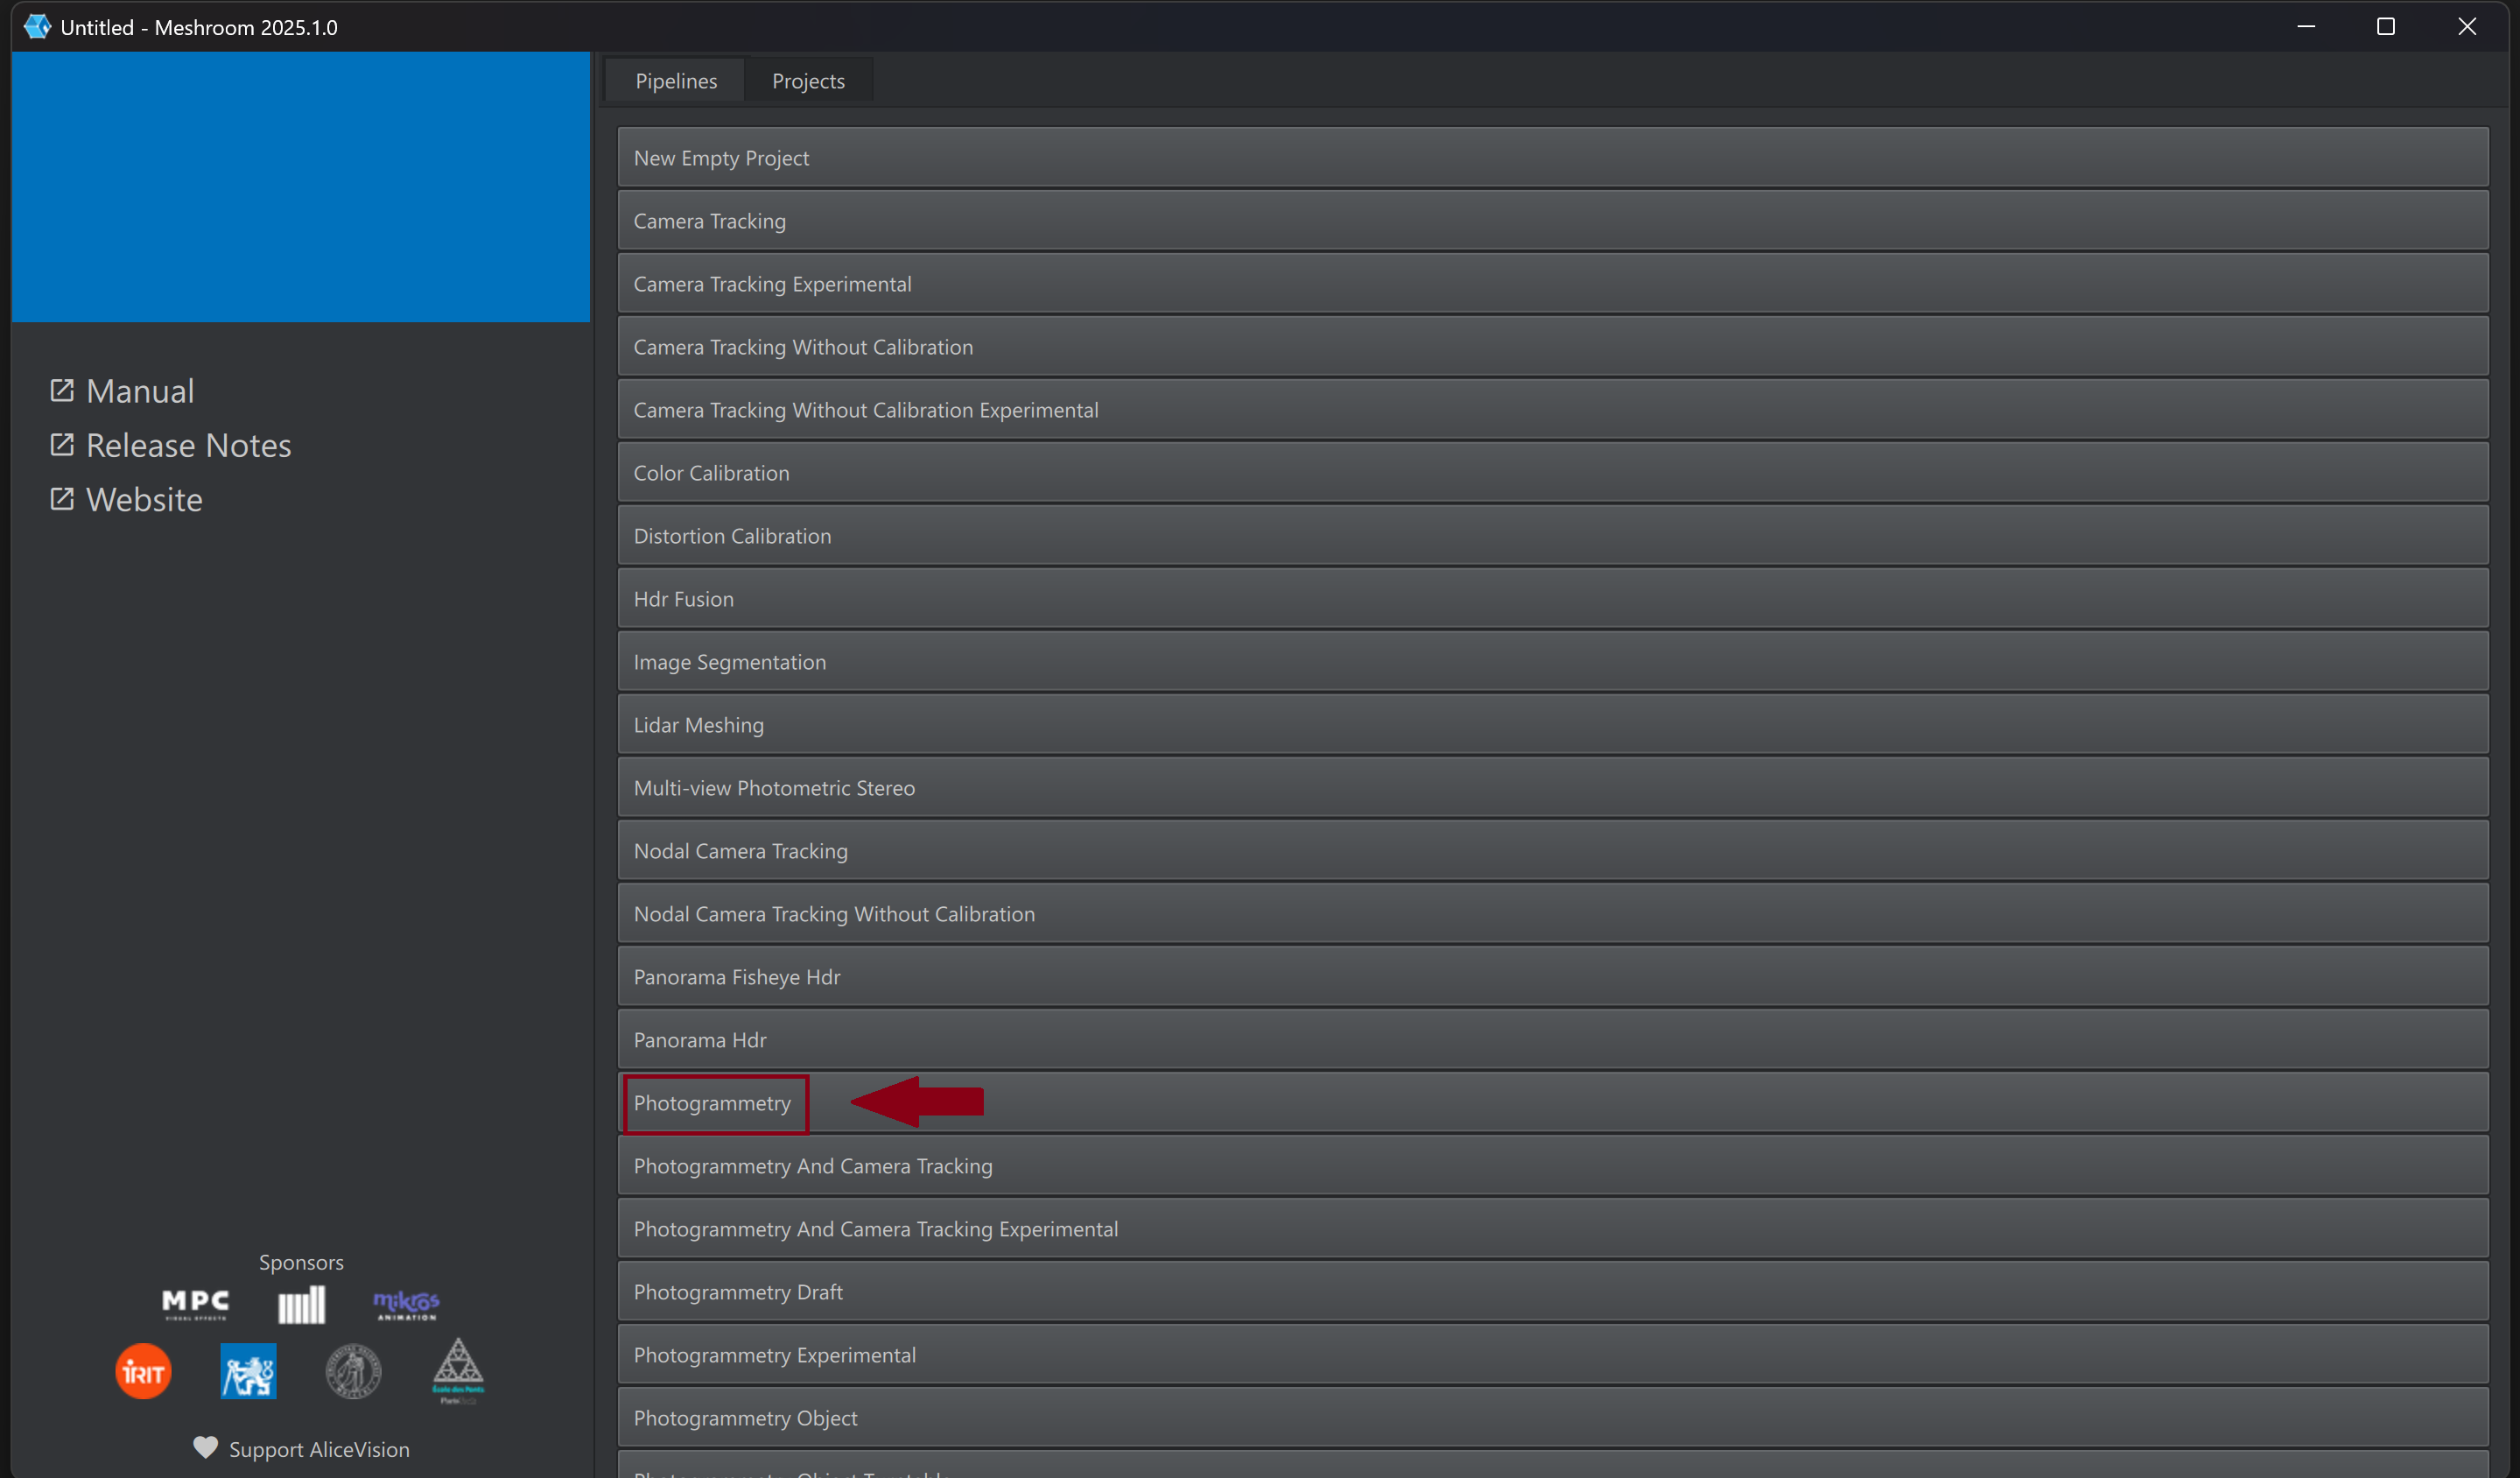
Start Meshroom and select Photogrammetry from the available pipelines.
-
Save the project.
-
Drag and drop the folder of images.
-
Hit Run and grab yourself a drink. It will take a moment for the pipeline to complete.
Observe the colours of the pipeline’s steps — green = success, orange = in progress, blue = awaiting, red = error.

- Once the pipeline completes successfully, you will see the sparse cloud.
- To view the mesh, double-click the Meshing component. It will appear in the Scene menu on the right-hand side, where you can toggle it on and off. If the mesh is white or not visible, head to the It Doesn’t Work 😱 section.
- To view the textured mesh, double-click the Textured Mesh component. It will also appear in the Scene menu. If the mesh is white or not visible, head to the It Doesn’t Work 😱 section.
- To view the dense point cloud, go to the Meshing component, scroll down to Dense Point Cloud, and double-click it. It will appear in the Scene menu on the right-hand side, where you can toggle it on and off.

It Doesn’t Work 😱
❗ Unfortunately, the current release has a bug — the meshes sometimes appear completely white. The meshes are fine, but we’ll need different software to render them.
If your meshes are white or do not show up:
- Install MeshLab.
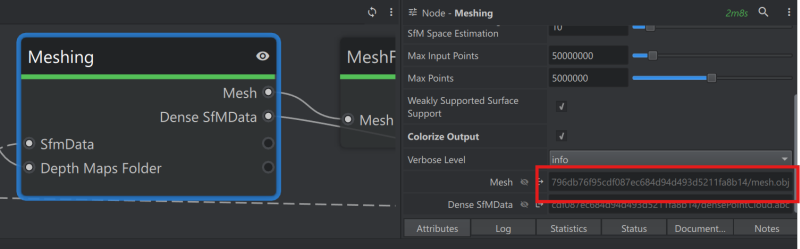
- In Meshroom, click the Meshing step and copy the path to your mesh.
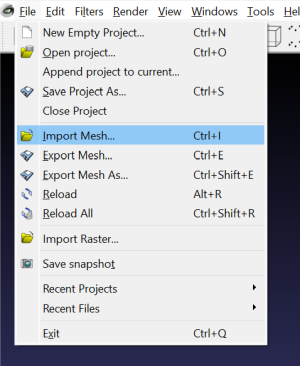
- In MeshLab, go to File → Import Mesh, and paste the path you just copied from Meshroom.
- In Meshroom, click the Texturing step and change the File Type to PNG. Copy the path to your Mesh.
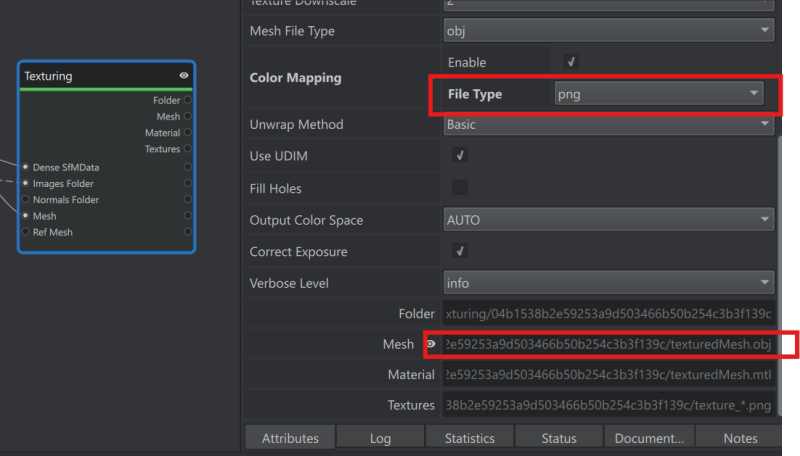
- Recompute the Texturing step.
- Once it completes, go back to MeshLab, choose File → Import Mesh, and paste the path you just copied.
Further Exploration
If you’ve made it this far — congratulations, you’ve built your first reconstruction.
If you’d like to go deeper, below are a few excellent resources worth exploring.
Computer Vision Theory
- Szeliski, Richard. Computer Vision: Algorithms and Applications. Springer Nature, 2022. Free download. See Section 11.4: Multi-frame Structure from Motion.
- A 4-minute video explaining the problem solved by Structure-from-Motion (from First Principles of Computer Vision).
- Lecture on Structure-from-Motion — deriving a sparse point cloud and calibrated cameras (CVRP Lab, NUS).
- Lecture on Multi-View Stereo — algorithms that estimate pixel-wise depth to densify the point cloud (CVRP Lab, NUS).
- Two classic surface-reconstruction algorithms: Poisson Surface Reconstruction and the Ball-Pivoting Algorithm.
Projects that Changed the Landscape
- Building Rome in a Day — a University of Washington project that showed it was possible to reconstruct an entire city from thousands of publicly shared tourist photos.
Between Lectures and Tutorials
- Excellent video on Topographic Point Clouds and Structure from Motion by Ramon Arrowsmith (OpenTopography).
Software Tutorials and Documentation
- AliceVision Photogrammetry Pipeline — documentation describing each step and the algorithms behind it.
- Faraglione with Agisoft Metashape (by Chelsea Scott) — introduces a drone photo dataset from Vulcano Island, Italy you can also process in Meshroom.
- RealityScan (formerly RealityCapture) — now free for individuals earning under $1 million USD per year. What’s remarkable about RealityScan is that it connects directly to the Unreal Engine ecosystem, letting you bring your 3D scans straight into interactive environments and games.
Next Investigation
Every reconstruction is a small investigation — a way of recovering structure and understanding how things connect.
Next time, we’ll put our own brain under scrutiny: we’ll follow our eyesight and observe how picky, and how seemingly disordered, it is.
In other words, we’ll look into the mechanisms of visual attention.